The steps below will describe how to open a self service enrollment session. A session may be opened for an Individual or Groups of individuals that you specify based on class, location, division, and/or hire date.
Prerequisites
- This feature is only available if self-service is enabled for the Company.
- Self-Service settings should be configured prior to enabling benefits for Self-Service enrollment.
- Archived individual records will not be included in a Self-Service enrollment session.
- The individual’s record must contain a home and/or work email if an invitation will be sent to them from Common Benefits.
Creating a New Self-Service Enrollment Session
-
From the company Home screen, click Self Service and then Enrollment Session Configuration.
-
Click Add Enrollment Session

-
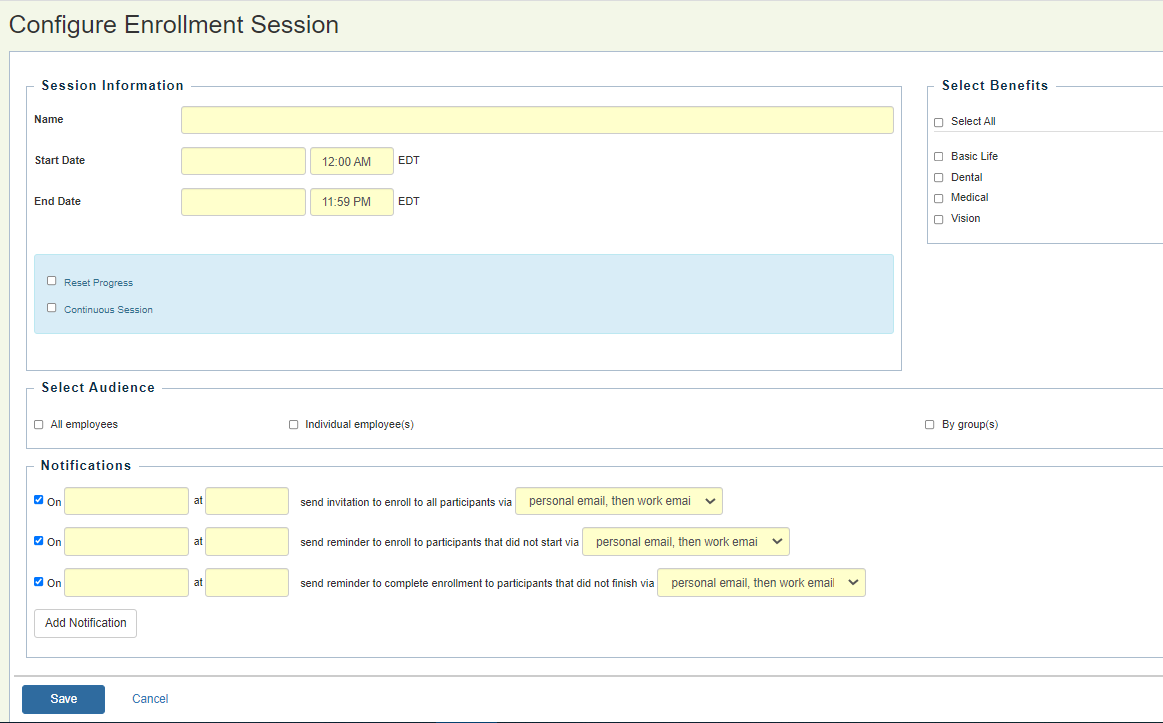
Enter a Name to identify the self-service enrollment session and the Start and End dates for the period of time when benefits will be available for self-service enrollment.
-
Select which benefits to include under Select Benefits.
-
Select Continuous Session if the employee should remain in wizard mode for the duration of the enrollment session. If left unchecked, the employee will only be in wizard mode until they reach the last screen of self-service and click the Finish & Submit button.
-
Finally, select the audience of employees that should be included in the enrollment. This can be set for all active employee records, by individual employee, or for a custom group of employees.
-
Configure Notifications. Notifications can be used to send emails to specific groups of individuals automatically based on their progress through the self-service interview process. See more information on Self-Service Notifications.
-
Click Save to create the self service enrollment session.
Note: Selecting Reset Progress will re-enable wizard mode for employees based on the date and time entered.