The steps below will describe how to create, edit and Delete a SyncaPay® Plus export configuration on Common Benefits.
Creating a New Export Configuration
From the Home screen click on Tools and then Exports. Click Create New Export and select Syncapay® Plus from the options.
-
Select the Dataset, File Format, and Export Type from the drop down lists.
This will determine the type of data being exported and what kind of file will be created. If applicable, you must also select which benefits will be included in the export.
Some datasets will also allow the data to be formatted in a cross-tab format. This can be selected by checking the Cross-Tab Export box.
Click Continue to advance to the next screen.
-
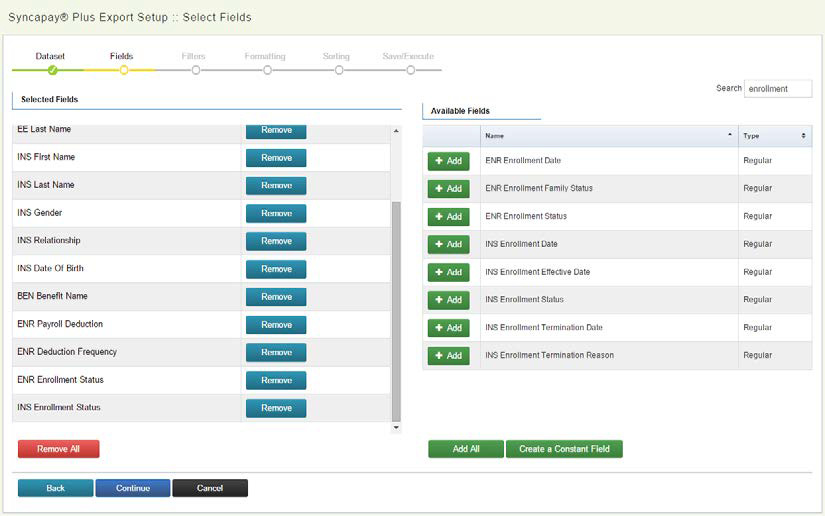
The Fields screen is where fields are added and removed from the export. The available fields depend on which dataset was selected. Each field selected represents a column of data on the export file.
Click Add to include a field in the export, or Remove to remove a field from the export.
Click Create a Constant Field to create and add a new export field. This is useful for adding a column of values to the export which are the same (constant) for all records, such as a group number.
Once all fields have been added, click Continue.
-
The Columns Screen will display if the Cross-Tab export option was selected on the dataset screen. The Columns are added in the same manner as on the fields screen.

Note: this screen will not display if the Cross-Tab export is not being used.
-
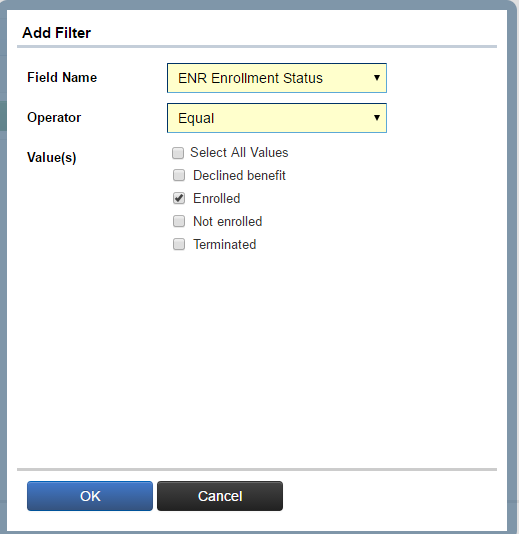
The Filters screen includes options to filter which records are included in the export. A filter includes a database field (Field Name), an Operator, and one or more Value(s) .
Click + Add Filter to create a new filter. Select the Field Name to use in the filter and an Operator. A Value(s) must then be selected from the list or manually entered depending on the Operator.
For example, the below example shows a filter which will only export records where the “ENR Enrollment Status” field is equal to “Enrolled”.
Click OK to save the filter.
Once all filters have been added, click Continue to proceed.
Every record must meet each filter requirement in order to be exported. It is possible to filter ALL records out of your export if mutually exclusive filters are added.
Example: We need an export of all employees in the Main Office OR the Warehouse. So we create a single filter that checks for either of the two values: EE Location Name = “Main Office”, “Warehouse”.
If we created two separate filters, then no records would export, because every record would fail to meet one of the two criteria: EE Location Name = “Main Office” AND EE Location Name = “Warehouse”.
-
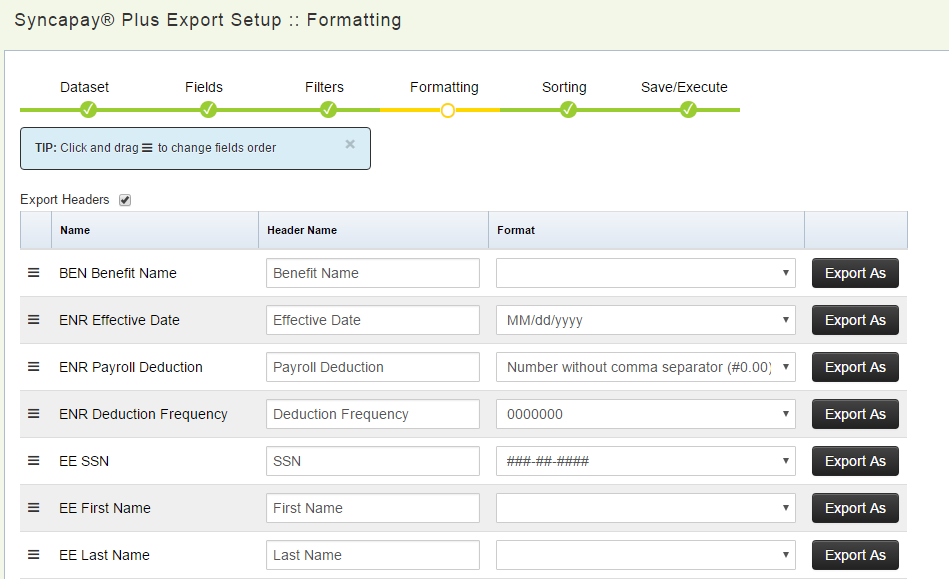
The Formatting screen allows formats to be applied to the data, column headers renamed, and the field order changed. Each field in the table represents a column on the export file.
-
The field order can be changed by dragging and dropping the “three line” icon in the left hand column of table.
-
Column headers can be renamed by changing the default entry under Header Name column.
-
Formats can be applied by selecting a format from the drop down box. The type of field determines which formatting options are available to choose from.
-
Click Export As to replace values in the database with other values on the export file. This is useful when creating export that have specific location codes, benefit codes or other identifiers.
Once all formatting options have been set, click Continue .
-
-
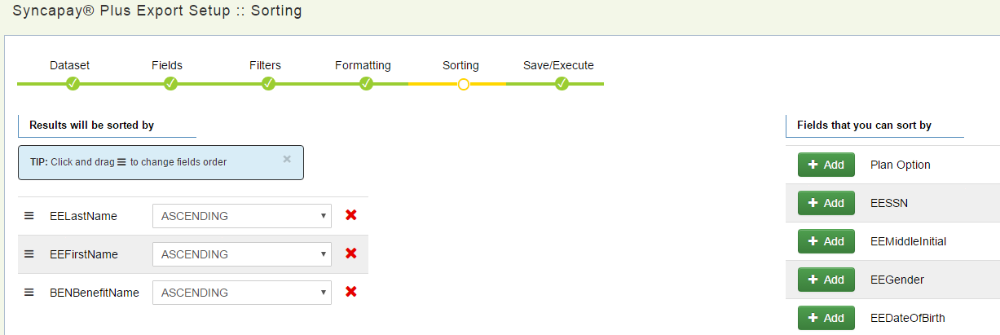
The order of the records on the export can be specified on the Sorting screen. If no sort is specified, the records will be exported in no particular order.
Click Add to select a column to be sorted, then choose whether the data will be sorted in Ascending or Descending order. The first sorting option in the list will be applied to the export records first, the second sort will be applied second, and so on.
once all sorting options have been set, click Continue.
-
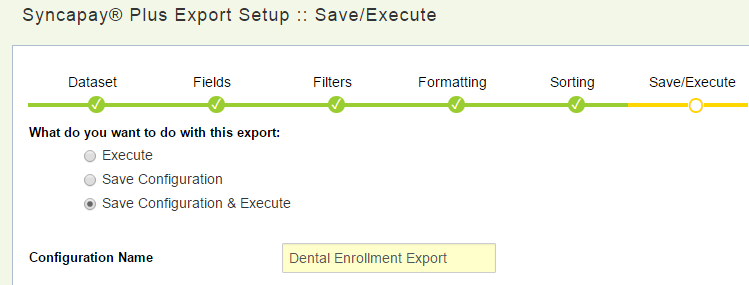
The Save/Execute screen is the final screen of the export wizard.
-
The Save Configuration or Save Configuration & Execute options allow the export configuration to be saved and run again. The Configuration Name will appear on the list of exports once the configuration is saved.
-
The Execute option will run the export but the configuration will not be saved for future use.
-
Click Save/Execute to run the export. The resulting export file will be generated, and a download link will then display. The export file will also be available on the Exports History tab.
-
Setting Permission and Changing or Deleting a Configuration
Additional settings may be configured for each export configuration.
-
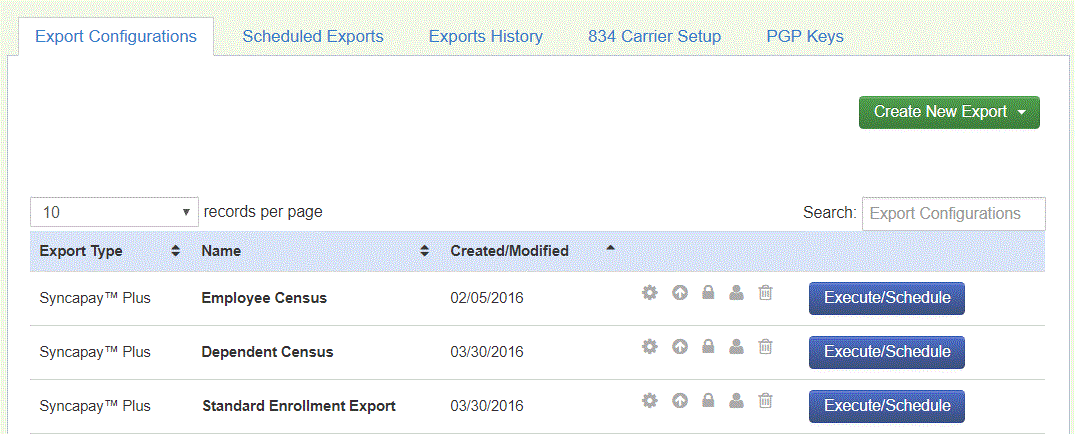
From the Home screen click on Tools and then Exports to display a list of available export configurations.
-
One of the following actions may be specified for each export by clicking on the corresponding Icon. Hover your mouse over the Icon to display a tool tip listing its function.

-
Configure will open the selected export configuration, and allow changes to be made.
-
Permissions is used to configure what users may View, Execute, and Configure the selected export. Unless they are given privileges, other users will not have access to the selected export.
-
Delete will remove the selected export configuration from the system. This cannot be undone.
-
FTP and PGP are used to configure the automatically sending of an export file. These functions are only available for a Common Census Employee to use.
-