Overview
This article will provide an overview of the different settings that may be configured for Self-Service enrollment.
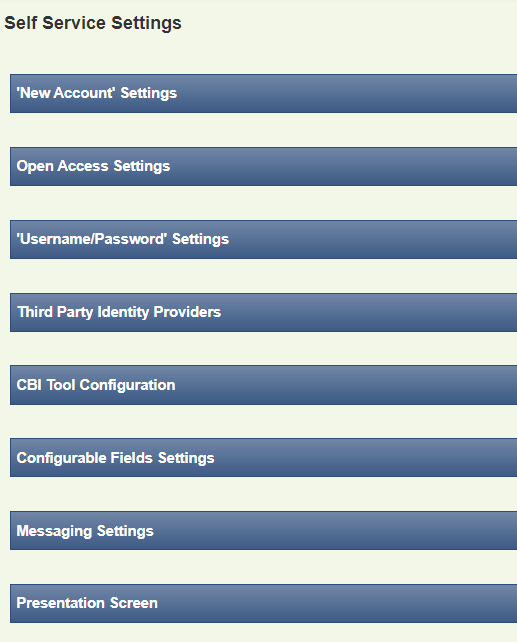
From the Home screen click on Self Service and then on Settings to display the settings screen. This is divided into different sections that cover the various configuration items.
Click on a section header to expand that section:
Each section is described below:
'New Account' Settings
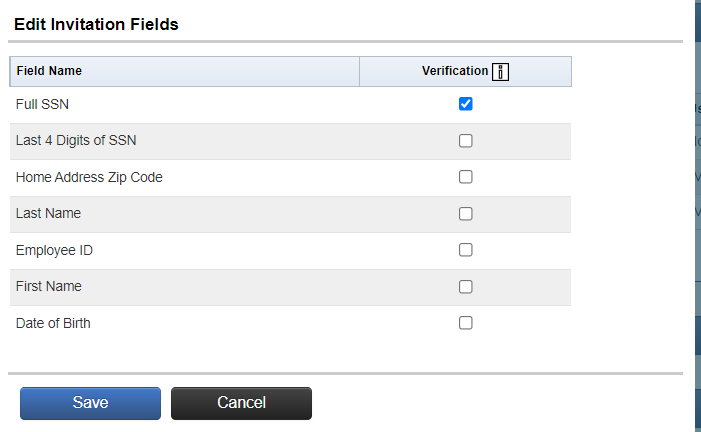
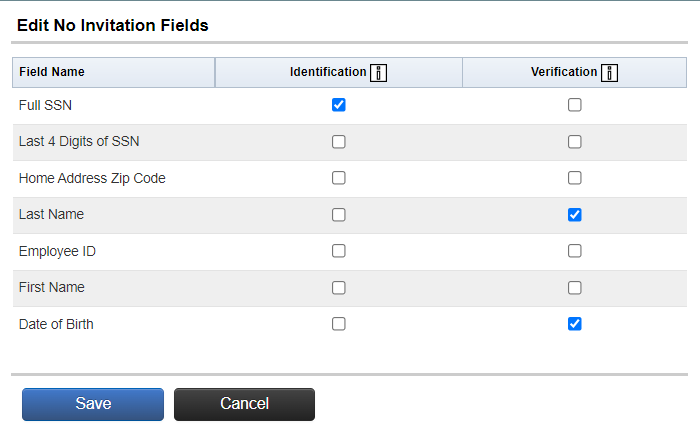
The 'New Account' Settings screen is where the identification and validation criteria are specified for self-service account creation. This is the information that the individual will enter to identify their record in the database and also to verify their identity when creating their self-service account.
There are two scenarios that will need to be configured. Click Edit to configure the criteria:
-
With Invitation: When self-service notification emails are used, the individual will only need to provide information to verify their identity. The system will have already identified their record based on the invitation code in the email.
-
Without Invitation: Identification and Verification criteria will need to be specified when self-service notification emails are not used.
Select the criteria that should be used by placing a check next to the item. Click Save to complete the configuration or Cancel to discard the settings.
Note: There are some important considerations to keep in mind when selecting the Identification criteria:
-
The individual should be prompted to enter in enough information to uniquely identify their record in the database. for example, If first or last name is set as the only identifier, then the system would be unable to locate the record if several records share the same first or last name.
-
The information entered by the individual during account creation will have to match exactly the information on their record.
Open Access Settings
When a company is configured to use Open Access, it does not require the employee record to be loaded in the database prior to self-service enrollment. The individual will create their own record in the database at time of account creation on the self-service site.
Your Common Census representative will have to configure these settings.
Username/Password Settings
This setting specifies the criteria for the individual’s user name. The available options include the home email, work email, or a user created username.
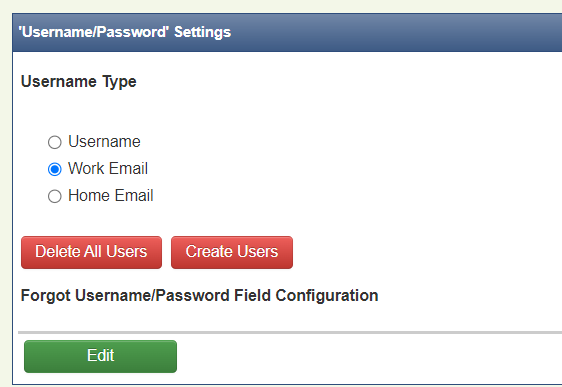
Clicking Delete All Users will delete any existing self-service accounts.
Clicking Create Users will create a user account for the individual based on username type (this option is only available for the Work or Home Email username type). Individual’s accessing the self-service site for the first time would then need to click Forgot Password to specify a password for this account.
Note: Changing the username type will remove any existing self-service accounts, and the individual will have to create a new account the next time they access the self-service site.
Clicking Enable Two Factor Authentication displays two-factor authentication settings for the self-service website. Two-factor authentication can use any email address, as well as any mobile or home phone as an authentication method.
Employees logging into the self-service website will only see relevant contact options when logging in.
Third Party Identity Providers
This setting enables the functionality to user a third party provider to verify the individual’s identity when creating their self-service account.
Your Common Census representative will have to configure these settings.
CBI Tool Configuration
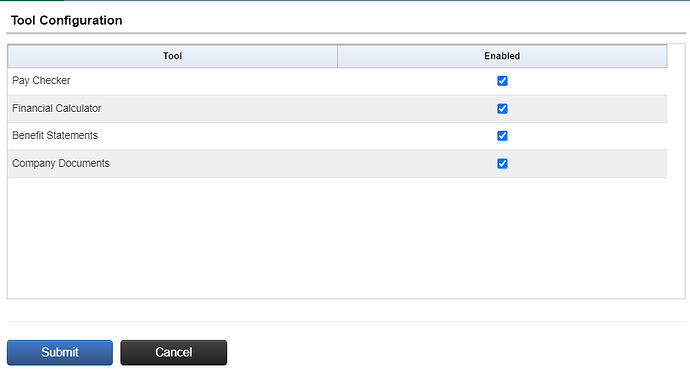
This setting will determine which tools are displayed to the individual during self-service enrollment.
Click Edit to enable or disable the individual tools.
Click Submit to save the configuration or Cancel to discard the settings.
Configurable Field Settings
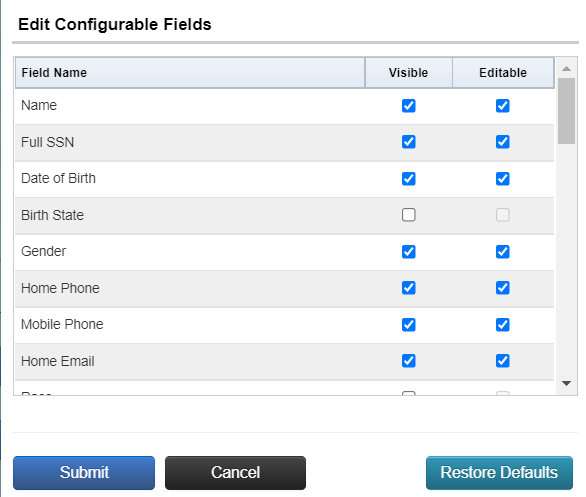
This setting will enable or disable the fields that display during self-service enrollment. There is also the option to hide certain screens and all of the fields contained on that screen.
Click Edit to launch the configuration utilitly.
-
Visible: unchecking this setting will hide the field or screen from displaying on self-service.
-
Editable: unchecking this setting will make the field read only and not able to be edited by the Individual.
Click Restore Defaults to reset the settings back to the default of all fields visible and editable.
Messaging Settings
This setting enables the ability for an individual to send a message to an administartor during self-service enrollment.
The message feature is handled through the Common Benefits software and should not be confused with a text messaging or similar application. The administrator is a user that has the necessary permissions levels on Common Benefits to view messages sent through the system.
Check the box next to to the Enable Employees Messaging box to enable this feature.

Presentation Screen
This setting allows a presentation screen to be added to the self-service site. The presentation screen will be the first screen that the individual will see after logging onto self-service.
Check the I agree that I am responsible in case of attaching malicious scripts box and then click Choose Presentation File to select the file to use as a presentation screen.
